Photograms/Schadographs/ Rayographs
A photogram is a photographic print made by laying objects onto photographic paper and exposing it to light. Some of the first photographic images made were photograms. William Henry Fox Talbot called these photogenic drawings, which he made by placing leaves and pieces of material onto sensitized paper, then left them outdoors on a sunny day to expose. The photogram technique is as old as photography itself but hasn't always been as popular, so emerged again in various avant-garde contexts in the early 1920s.
There are other artists which are associated with camera-less photographs such as Christian Schad and Man Ray, who refined and personalised the technique to such an extent that the new prints eventually carried his name, Rayographs.
There are other artists which are associated with camera-less photographs such as Christian Schad and Man Ray, who refined and personalised the technique to such an extent that the new prints eventually carried his name, Rayographs.
|
|

|

|
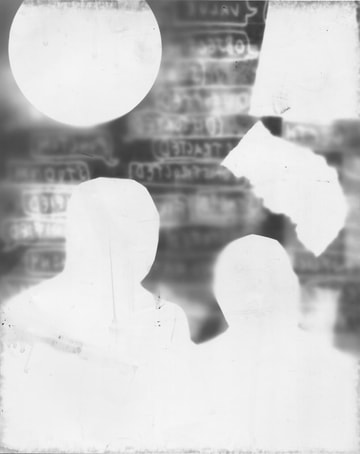
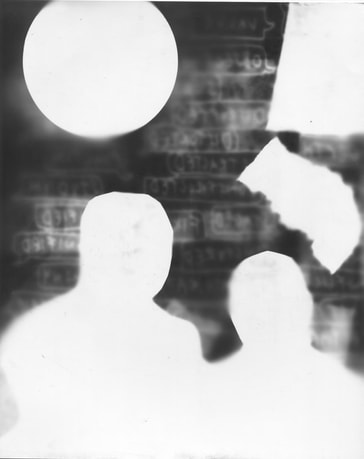
My first attempt at creating camera-less photography was an interesting learning experience for me. The aperture was fully open at f2.8 for all the photographs.
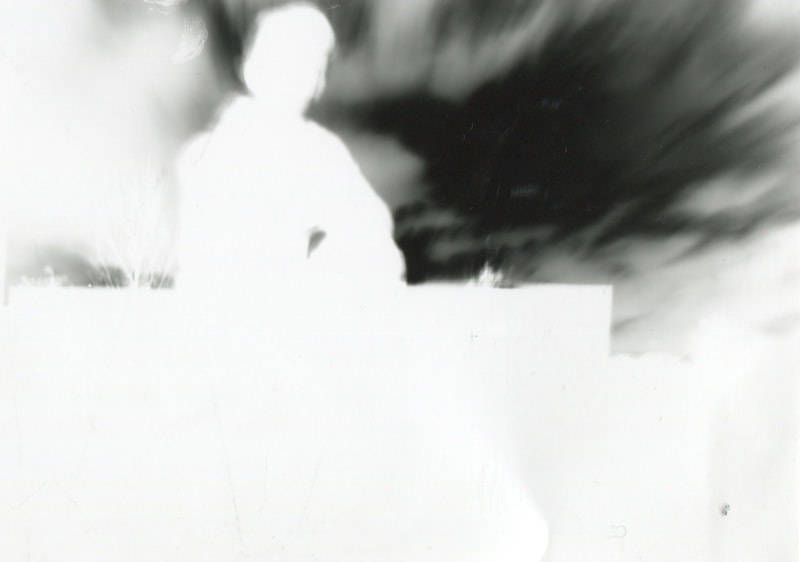
The first image on the top left was left for 10 seconds and I didn't feel that this was long enough, so I tried again with the picture next to it with an exposure of 15 seconds to the light. This was too long. We used layers of newspaper and cut parts out of the rest of it and created a sort of collage to experiment with in the dark room. I should have laid all of the pieces of collage flat on the paper as it blocked the light from reflecting the actual image that was on the collage onto the photo paper. The silhouette of the two gentlemen came out white as the image was inverted, the cut out was very dark. I decided to make some test strips by covering the light source above the photo paper, with an opaque object, and move it along every two seconds to get an almost gradient effect. My first attempt (on the far left) was an absolute fail as a hadn't quite grasped the concept yet, however my second attempt (just left) worked really well, and as you can see, has a gradient effect from 2 second exposure 10 second exposure. |
Aperture f2.8, 12 second exposure
|
Aperture f2.8, 8 second exposure
|
Aperture f2.8, 6 second exposure
|
|
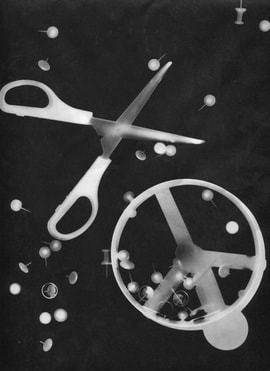
I used Kodak projection paper, light weight to produce this photogram. The arrangement itself I didn't give much thought to, however I really like how it came out! The objects came out in a high resolution and they look 3-dimensional which gives it an almost 'x-ray' look. I exposed the paper to the light for 15 seconds which was enough time to allow the objects outlines to be defined.
The paper I used for this image is amazing as it produces mid-tones of grey and gradients which makes the objects really stand out on the page. I really like how chaotic the layout of the pins is and how some objects fade into one another. The sharpness of the blades and the pins is rather striking. There is a bold mixture of circular and linear shapes which I like very much. |
|
Pinhole Photography
|
Negative image:
20 second light exposure
|
Positive image:
|
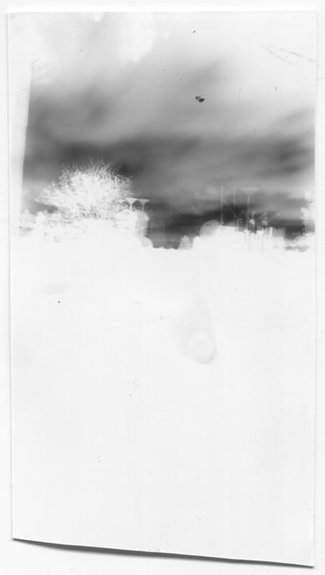
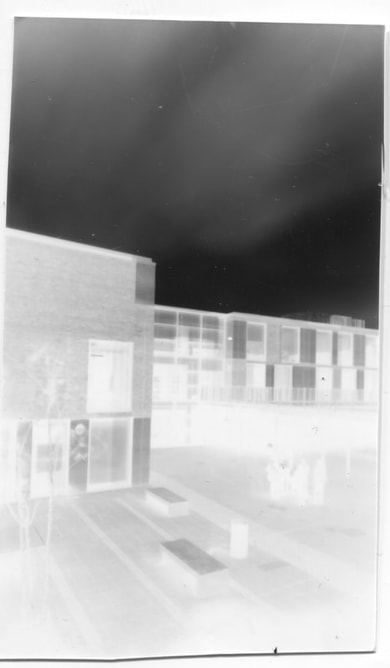
These photographs were my first attempt at image taking using a pinhole camera that was already made. The box used to make the camera was small and very light proof. I entered the dark room with the pinhole camera, (so that the light sensitive paper wouldn't get exposed and turn the whole image black) cut a small rectangular piece of the light sensitive paper and stuck it onto the back surface of the box, opposite the pinhole. The pinhole had a flap of black duck tape covering it so that the outside light wouldn't destroy our images. I took the camera outside and placed it on the ping pong tables on the concourse. I must have moved the camera just slightly when taking this because, as you can see above, the image is not completely sharp and has a blurred effect.
The three chemicals used to develop photos in the dark room are developer, stop bath (typically a dilute solution of acetic acid or citric acid, halts the action of the developer) and fixer (which makes the image permanent and light-resistant by dissolving remaining . silver halide. A common fixer is hypo, specifically ammonium thiosulfate. it is important that the chemicals are not contaminated with one another, as much as you can, when moving the paper through each process.
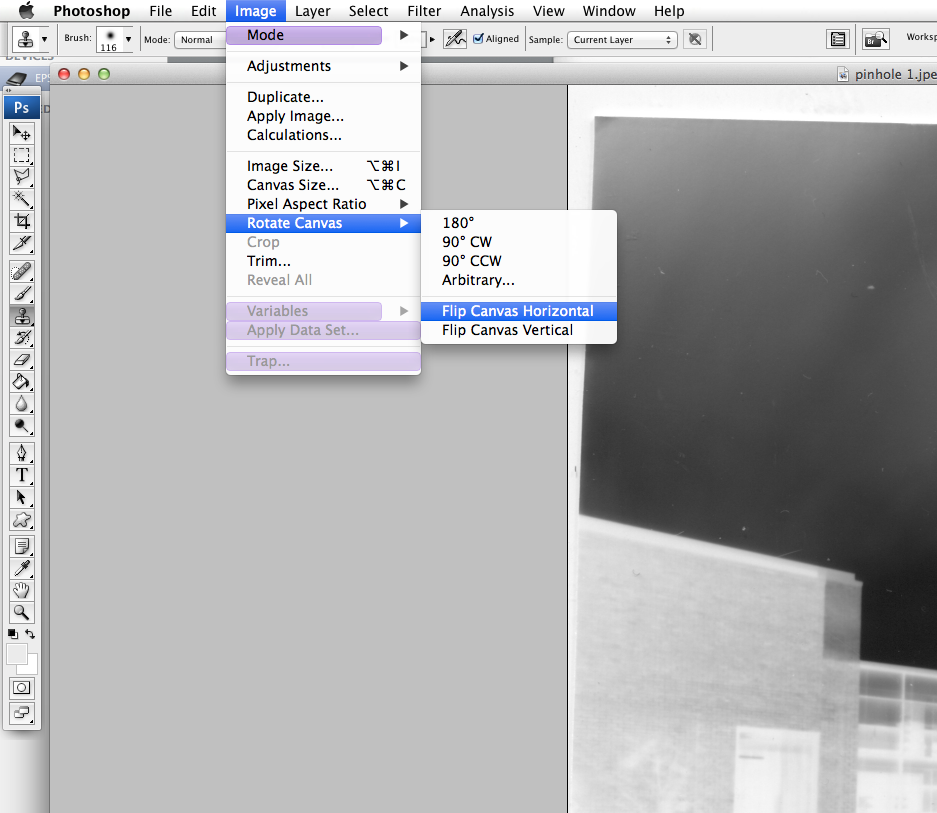
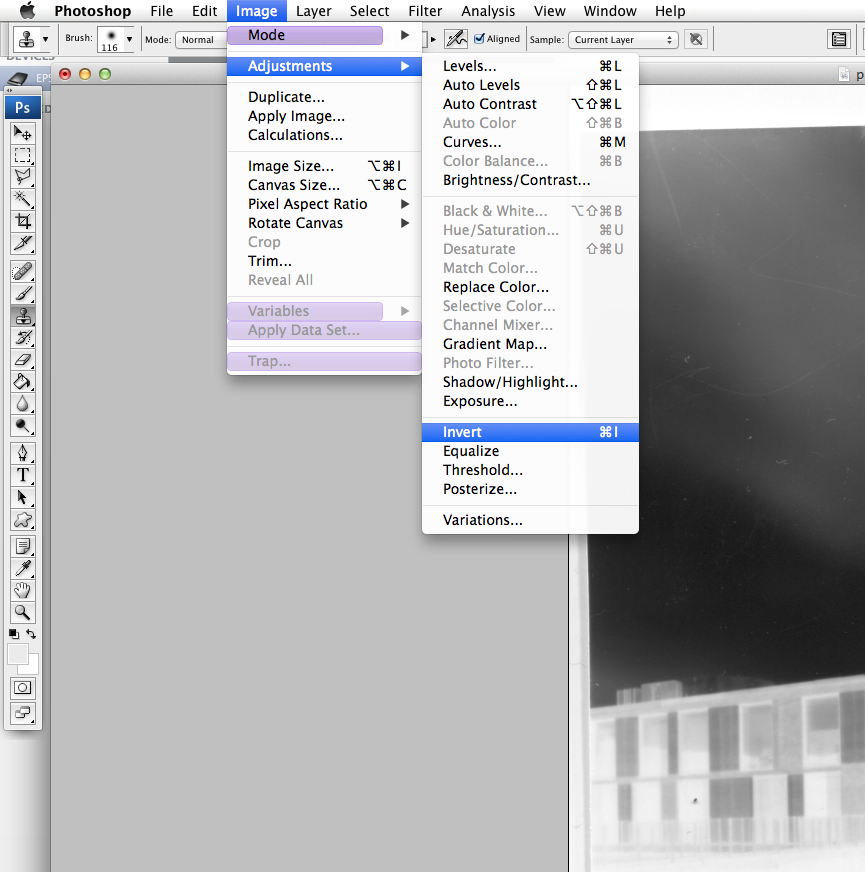
After the photographs were dry I scanned them onto a Mac computer and placed the negative image into Photoshop. The three steps to creating a positive image are below:
The three chemicals used to develop photos in the dark room are developer, stop bath (typically a dilute solution of acetic acid or citric acid, halts the action of the developer) and fixer (which makes the image permanent and light-resistant by dissolving remaining . silver halide. A common fixer is hypo, specifically ammonium thiosulfate. it is important that the chemicals are not contaminated with one another, as much as you can, when moving the paper through each process.
After the photographs were dry I scanned them onto a Mac computer and placed the negative image into Photoshop. The three steps to creating a positive image are below:
|
Negative image:
25 second exposure
|
Positive image:
|
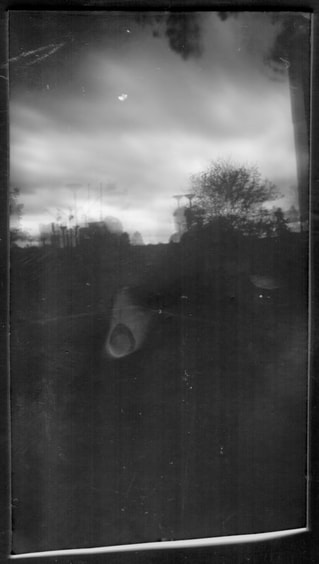
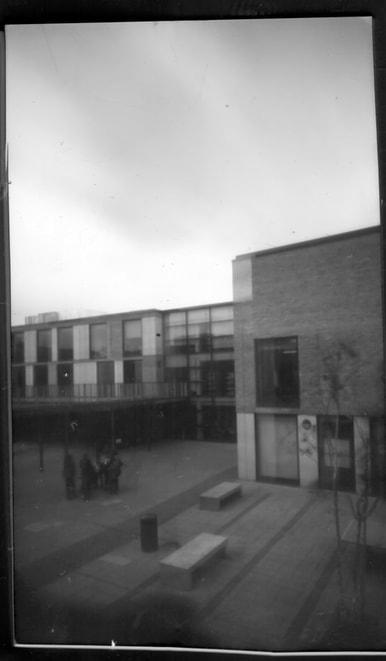
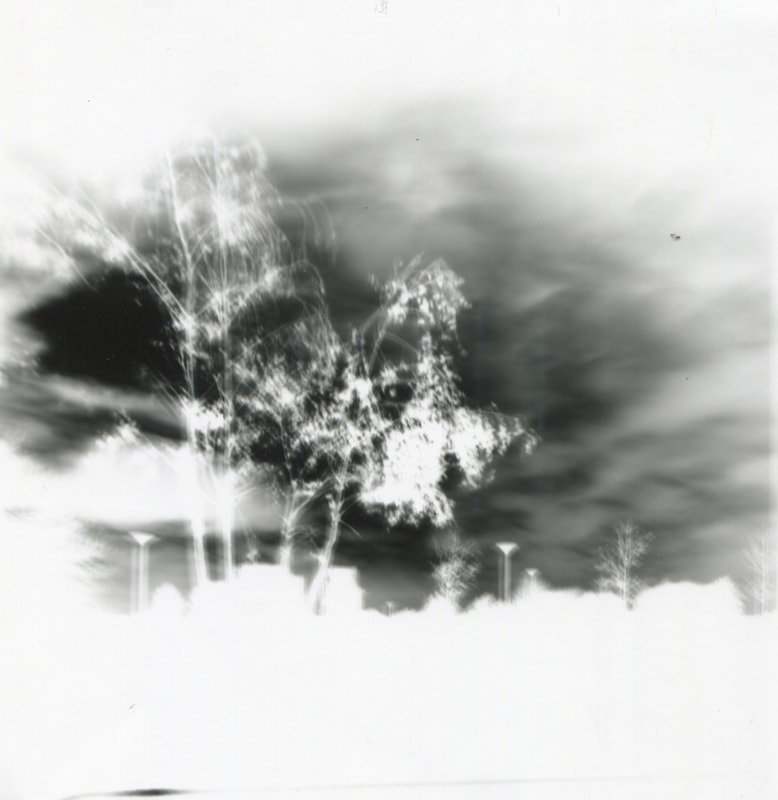
This image was made in the using the exact same process as in my first attempt. However I am proud of this image as my technique was better and I did not move the pinhole camera as much, so I got a much clearer image. I even caught a group of people standing still for 25 seconds which was by chance. This image turned out to be a good one because I exposed it for longer so all the objects were more defined.
Testing My Own Pinhole Camera
MY STEPS:
1) I located a normal sized (adult) shoebox that looked like I could make it light proof easily.
2) I taped up all the holes and gaps that could possibly cause light to reach my light sensitive paper when using my camera.
3) I spray painted the inside and the outside (except the bottom surface) with matte black spray paint and then left it to dry outside over night.
4) I spray paint the remaining sides and let dry.
5) I cut up an aluminium drinks can and took one small rectangular piece to use for my lense.
6) I cut a small square with a scalpel in the front (top) surface of my shoe box.
7) I pushed a pin so that it just went through to the other side and held the aluminium up to the light to check if there was light coming through, and there was.
8) So, I taped my aluminium rectangle (which should be slightly bigger than the rectangle cut with scalpel) to the opening.
9) The last step is to make a small flap to cover the pinhole, so light doesn't get through when not using it. I made this using a strip of black duck tape, folded it in half, leaving a small overlap to stick it down.
|
|
|
All these images were created with a pinhole camera that I made myself. I exposed each one for 20 seconds however they all moved and therefore came out blurry because I had to hold them up, to stop them falling over from the wind.
Even though my attempts did not proceed to make perfect pinhole pictures, I still quite like the effect it gave, and the fact that my pinhole camera actually worked was quite surprising also! If I was to try making pinhole photos with my own camera, I would add a stand of some sort to help the shoebox stand up even in windy conditions.
Even though my attempts did not proceed to make perfect pinhole pictures, I still quite like the effect it gave, and the fact that my pinhole camera actually worked was quite surprising also! If I was to try making pinhole photos with my own camera, I would add a stand of some sort to help the shoebox stand up even in windy conditions.
|
History of Pinhole Photography A pinhole camera is a simple camera without a lens and with a single small aperture Light proof box with a small hole in one side Light from a scene passes through a single point and projects an inverted image on the opposite side of the box. The Invention Alhazen (Persian Scientist) wrote about naturally occurring pinhole cameras like wicker basket slits or crossing tree leaves Pinhole images of the sun make the camera possible. Alhazen figured out that the smaller the pinhole the sharper the image. The 4th century was the beginning of the pinhole camera and Aristotle was the one who mentioned it The entire technique was brought about in the thirteenth and fourteenth century. The First Photograph was produced in 1827 by Joseph Nicephore Niepce - he made the first ever photographic image with the aid of a camera obscurer. Prior to this, the people used the obscurer to draw or view things. The first picture of a pinhole camera obscura is a drawing by Gemma Frisus' De Radio, an astronomer. He used the pinhole in his darkened room to study the solar eclipse of 1544. |

|
Another one of Steven Pippins artworks was a bathtub converted into a camera (1984). His work often involves a significant amount of planning to overcome the practical problems posed by the chosen object. Pippin typically has to plan and construct a significant amount of supporting equipment in order to achieve his pictures. Frequently the resulting photographs are distorted or otherwise compromised by the manner of their construction, but the imperfections are seen as an important characteristic of the image, giving a link back to the object which was used as a camera.
Pippin was short listed for the Turner Prize at the Tate Gallery for his work called Laundromat Locomotion in which he converted a row of 12 washing machines in a laundromat into a series of cameras triggered by a trip wire. He rode a horse into through the laundromat to create Eadweard Muybridges - 'The Horse In Motion'. |
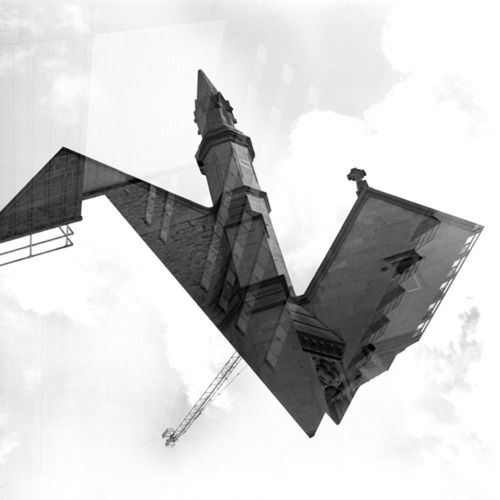
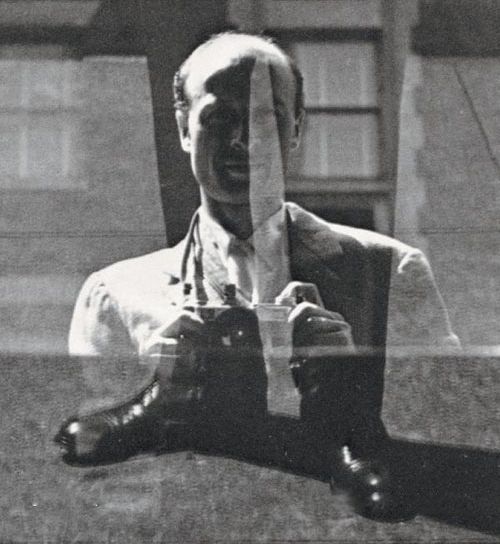
Steven Pippin
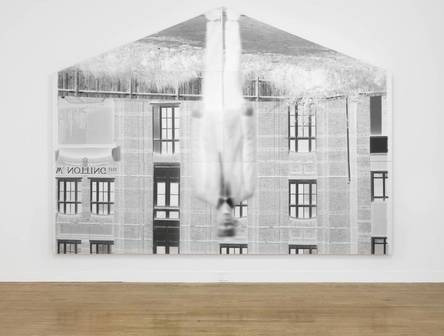
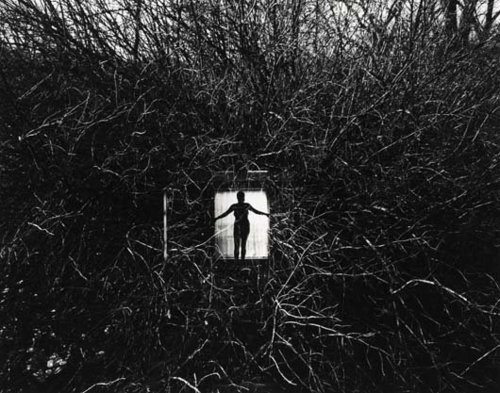
Stephen Pippin is an English artist born in 1960 in Surrey. Pippin works with converted or improvised photographic equipment and kinetic sculptures. For example some of his most famous artworks include: A self portrait made using a house converted to a pinhole camera (1986). To make this work, Pippin created a pinhole camera out of a prefabricated pre-war bungalow in Clerkenwell, London. He fixed sheets of photosensitive paper to the wall opposite the front door, made an aperture in the door, and then stood still in front of the bungalow for eight hours. The final image, made up of separate sheets of photosensitive paper, is an upside-down, black-and-white negative image of the artist and the warehouse-style building behind him. The ethereal, otherworldly effect produced by this negative image is increased by the blurred quality of the image of the artist in the foreground, a result of his minute, involuntary movements during the photograph's long exposure. 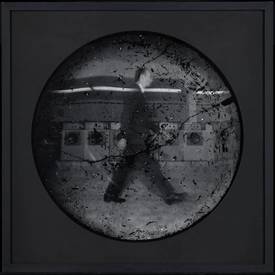
Pippin also used the laundromat to create a series of images called 'Walking In A Suit', one of which images is pictured above.
|
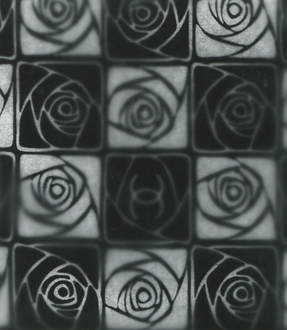
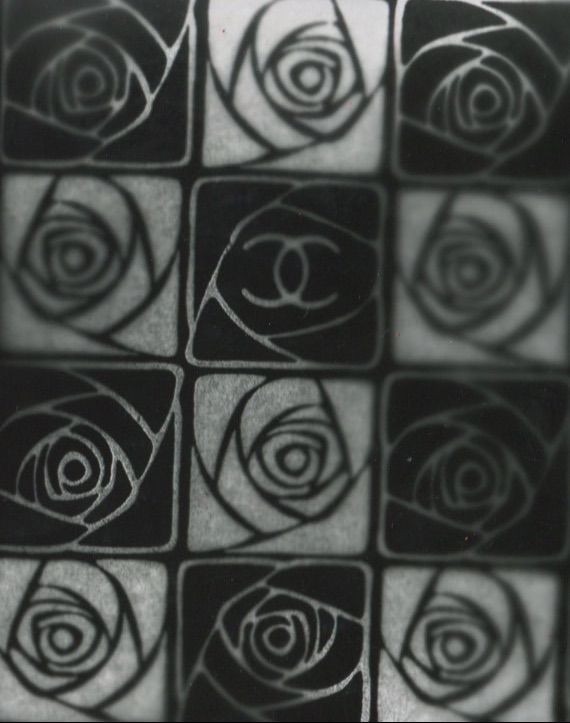
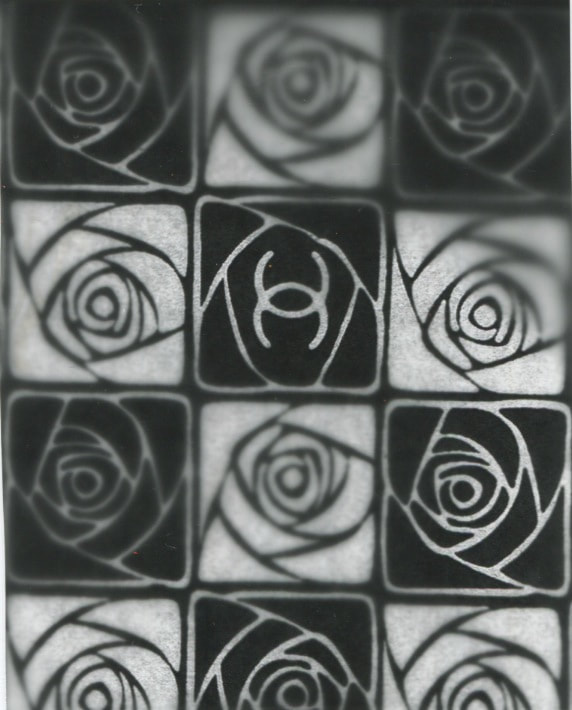
EXPERIMENTS IN THE DARK ROOM CHALLENGE

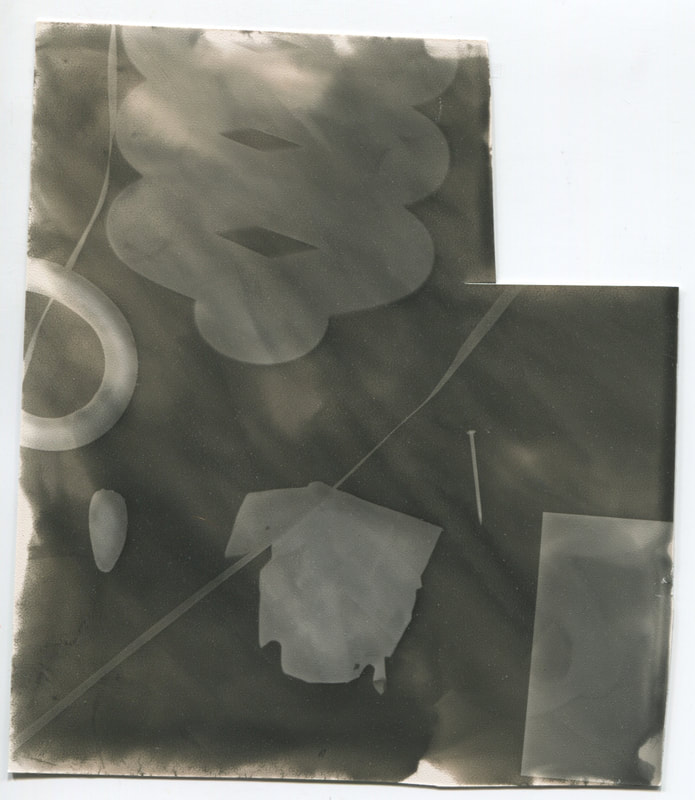
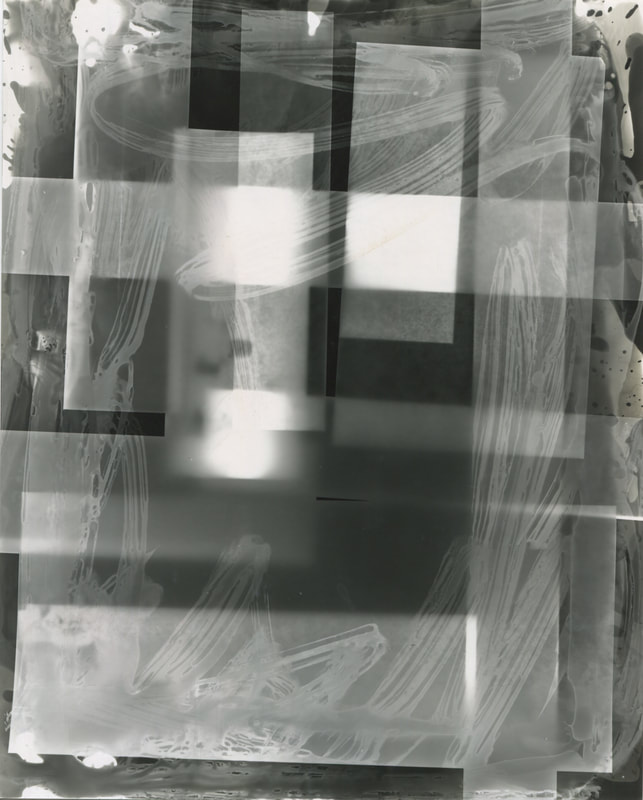
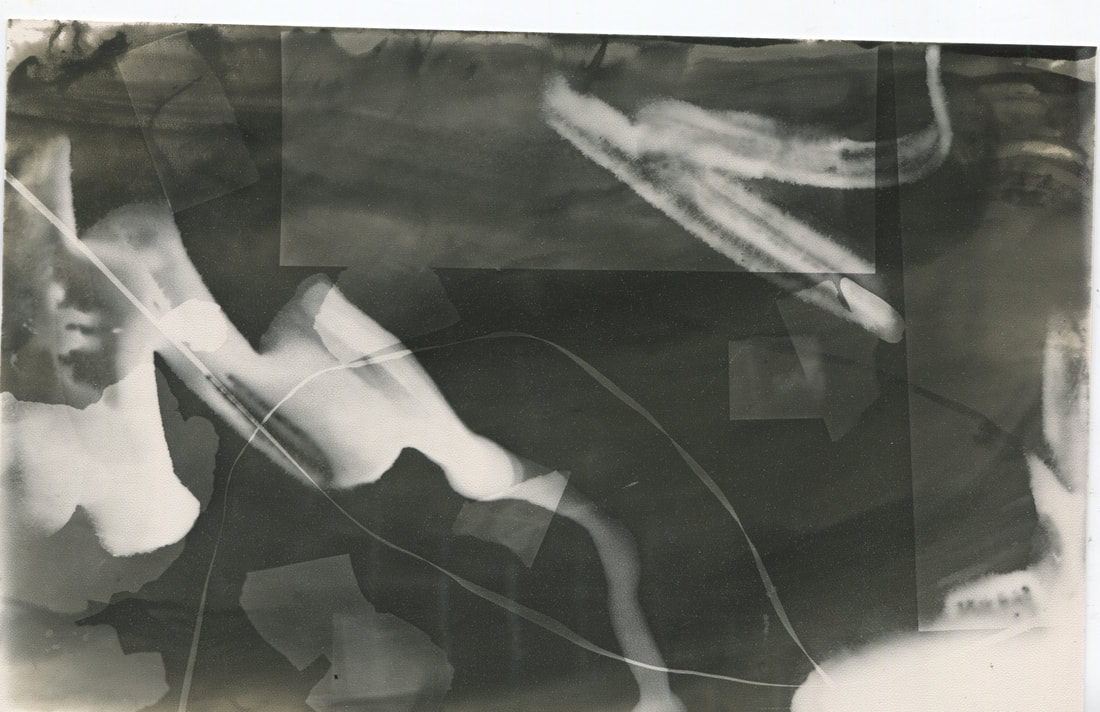
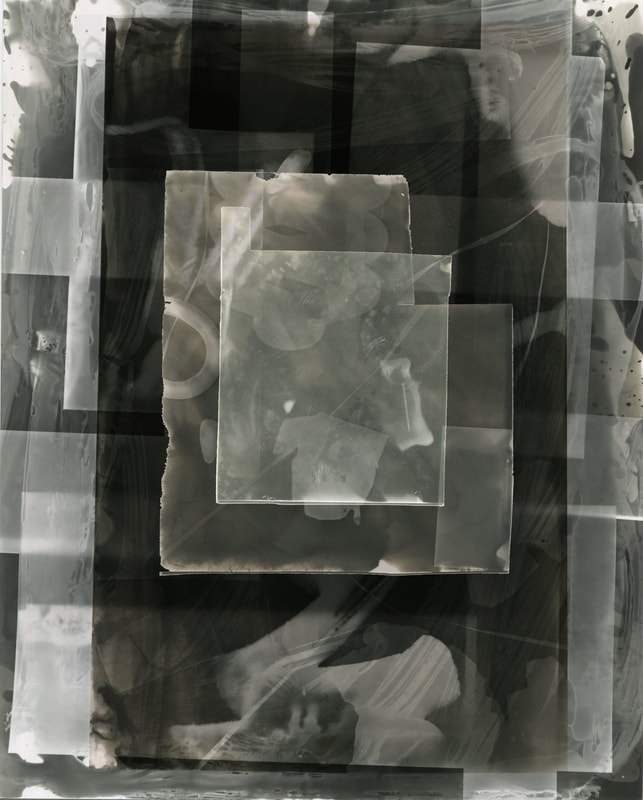
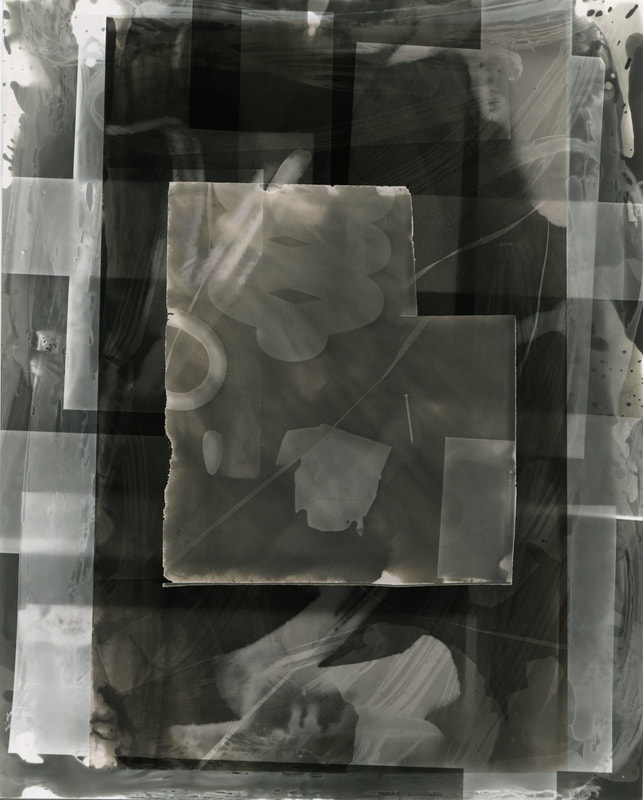

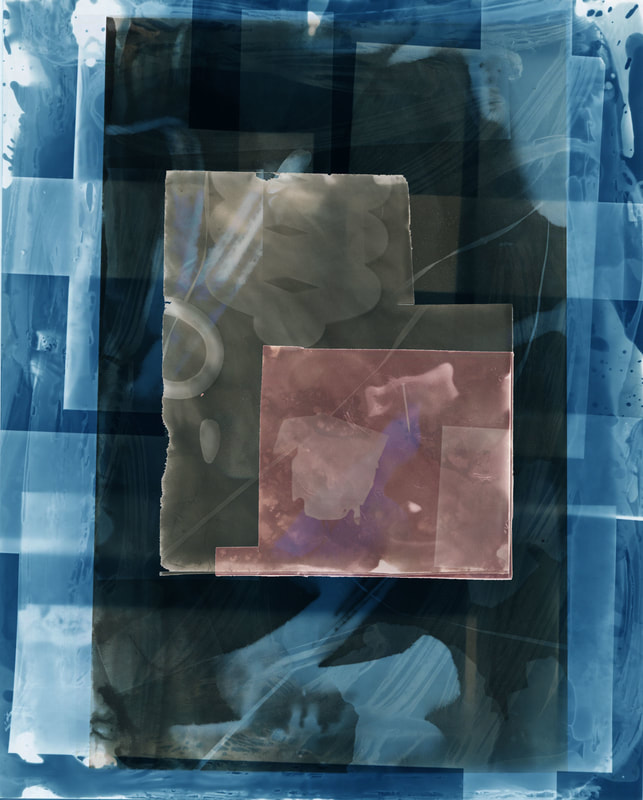
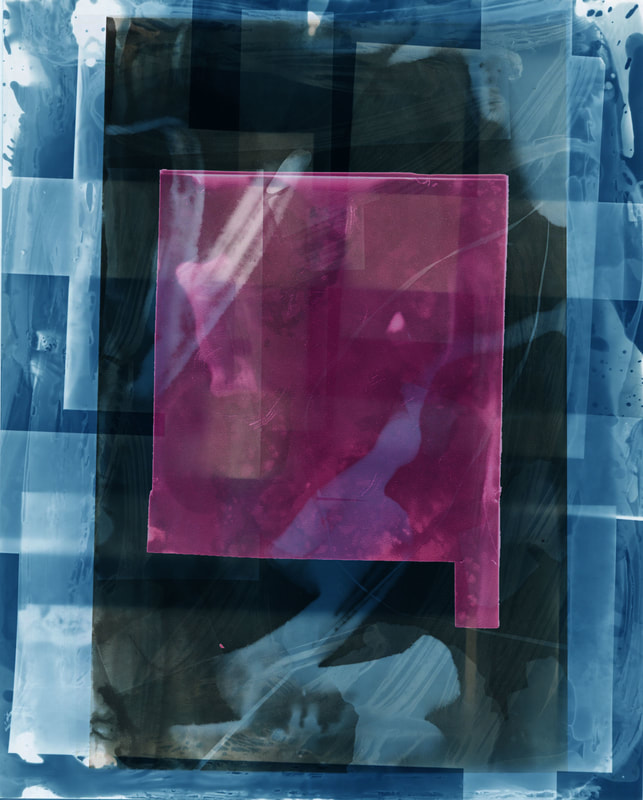
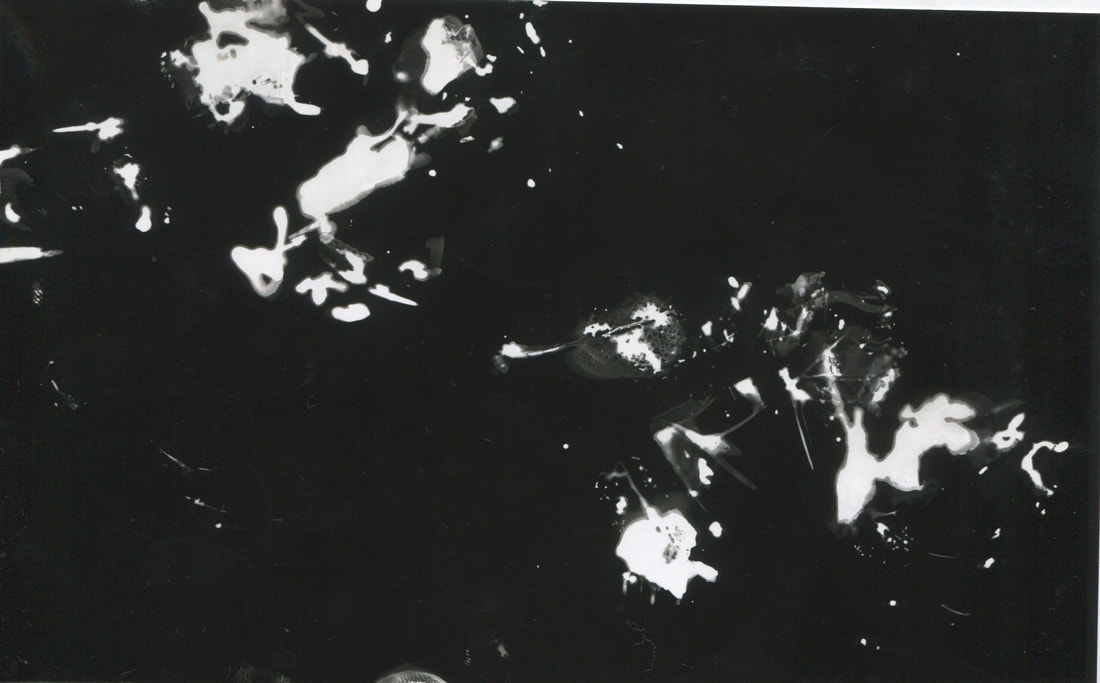
The first four images above are all singular photograms. in all of them I disrupted the development process of the light sensitive paper either by sponging on the 'developer' chemical placing it in the 'stop' chemical and then fixing it so that it would not be altered by natural light, painting on fixer with a brush so that these parts would remain white, placing objects (such as scissors, lightbulb, strips of paper, tissue, pins, tissue etc.) over the photographic paper to embellish the page with two-dimensional objects which were once three-dimensional, and then painting over the image with the 'stop' chemical to get an eerie grey-brown colour.
I then scanned all the images separately onto a Mac computer and played around with them on photoshop; copying and pasting (layering) over each other, rotating, changing opacities, changing colours, scaling larger and smaller, editing just certain strips with colour and opacity to get the final result which you can see above. I could have carried on and on with editing and changing the layers, however I simply ran out of time. This was just practice for my final piece which I hadn't decided yet, but I thought I wanted to use photoshop, however now I am not so sure. Although, I am sure that I was to 'disrupt' or 'interrupt' the chemical processes of the development using the developer, stop and fixer chemicals, combining these techniques with material 'interruptions' to distort the image and make it abstract.
I then scanned all the images separately onto a Mac computer and played around with them on photoshop; copying and pasting (layering) over each other, rotating, changing opacities, changing colours, scaling larger and smaller, editing just certain strips with colour and opacity to get the final result which you can see above. I could have carried on and on with editing and changing the layers, however I simply ran out of time. This was just practice for my final piece which I hadn't decided yet, but I thought I wanted to use photoshop, however now I am not so sure. Although, I am sure that I was to 'disrupt' or 'interrupt' the chemical processes of the development using the developer, stop and fixer chemicals, combining these techniques with material 'interruptions' to distort the image and make it abstract.
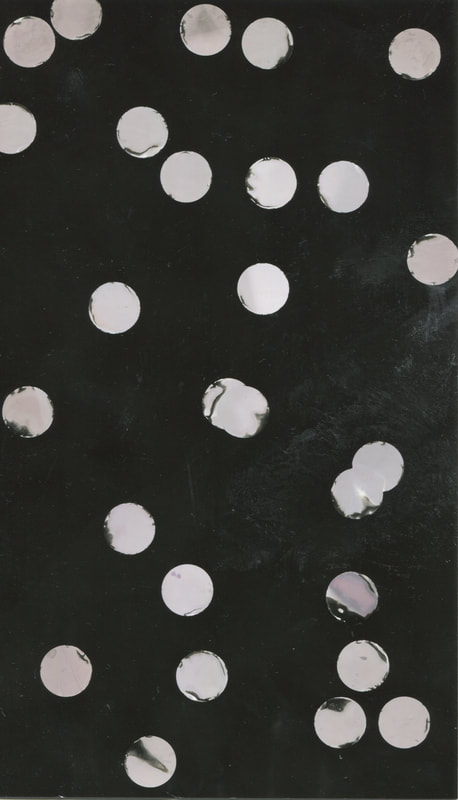
Abstraction using sticky dots
|
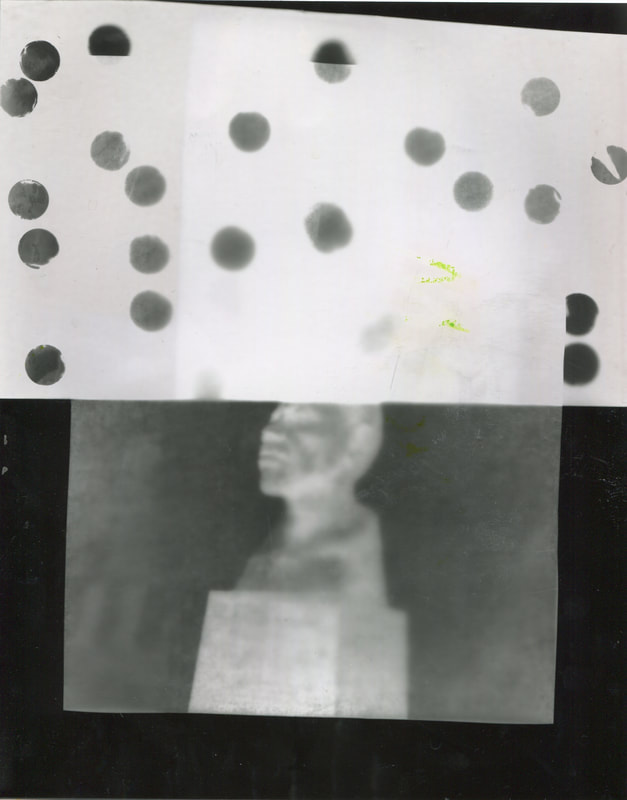
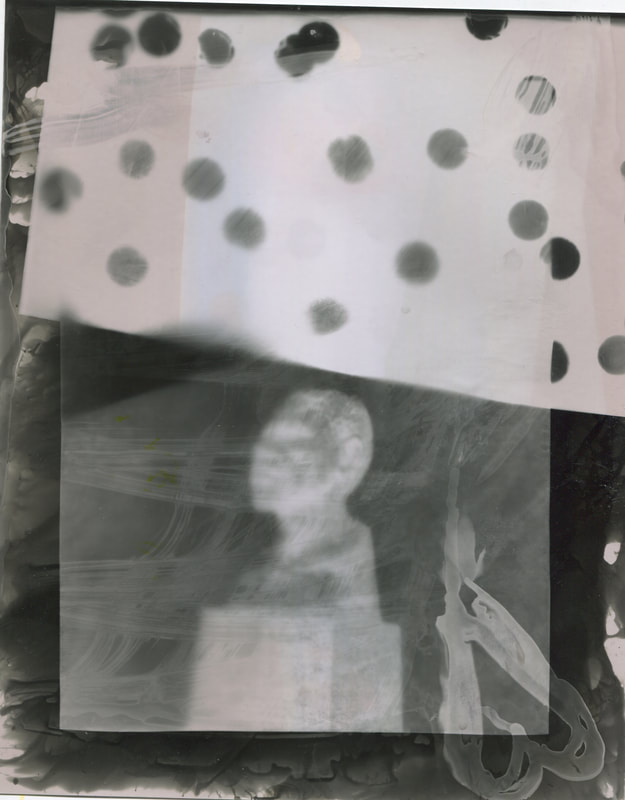
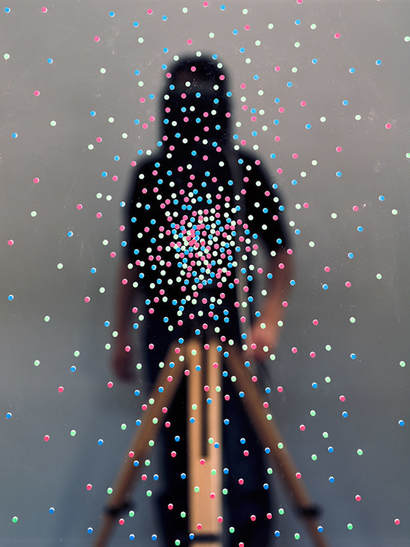
I did some research on analogue photography and came across the artist Akihiko Miyoshi. Throughout his series of images called 'Abstract Photographs' he explores form, color and focus in relation to the photographer. Standing in front of a mirror covered in circle or square-shaped stickers and hues, nothing more than a silhouette is ever visible in any one of his photographs. This image in particular inspired me to distort my photograms using sticker dots:
I liked the effect the stickers gave the photogram once I had peeled them off. Some developer had managed to get underneath the sticky dots which created a cool abstract effect, adding to the chaotic nature of the placement of the dots. Miyoshi's dots are arranged in a way that looks like they are being dispersed from the centre, however my dot placement was much more random than his. The next thing I did was experiment with overlaying the photogram of the dots on top of an image I had previously taken - a statue of Nelson Mandela's head. This came out pretty well however I wanted to combine some aspects of what I had done last lesson. I interrupted the development process of the paper with fixer on a paintbrush and lightly go over the some areas randomly, left it for a moment, and then went over the whole image with developer with the same paintbrush (rinsed in water) to partially develop the photogram. I then placed the whole image in the 'stop' chemical and then finally the 'fixer' chemical once again. I regret paining the heart in fixer on the bottom right hand corner, it takes some of the integrity and abstract quality away from it. Then I had a crazy idea...it took a while to source the equipment I needed... |
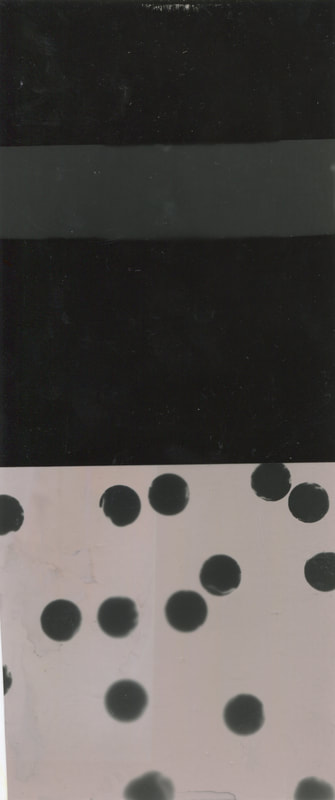
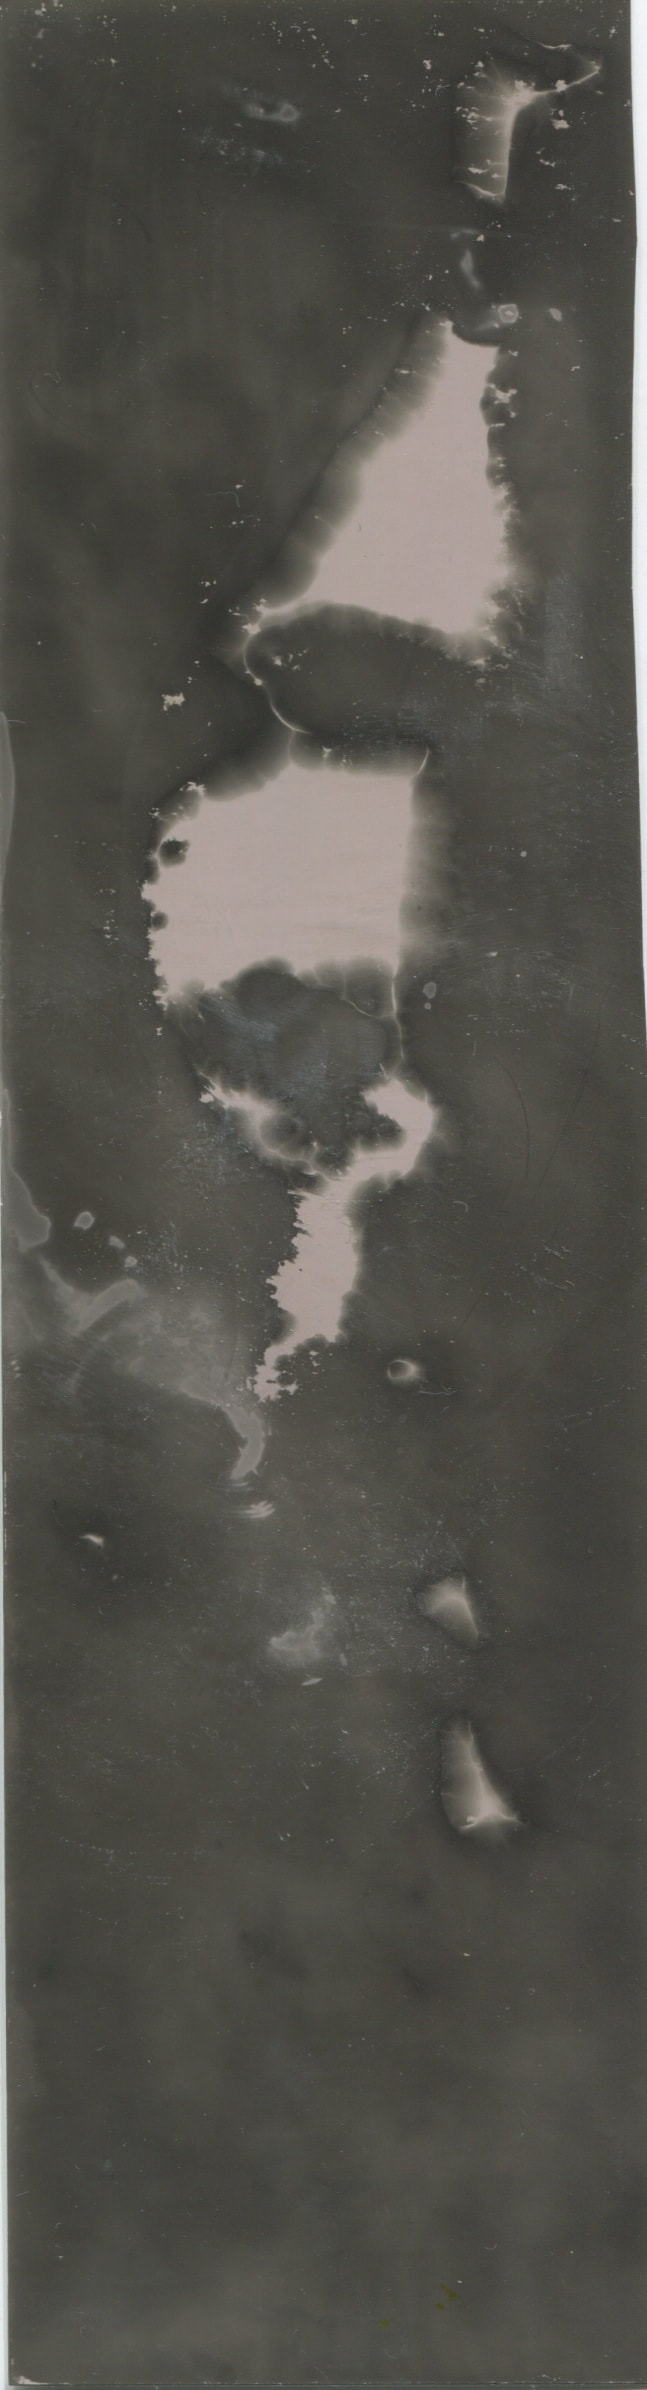
I wanted to try out a chemigram/photogram using oil. Vegetable oil in fact, which I finally sourced from the food tech lab. I attempted to dot some oil onto a test strip of paper (reference the 4th image) using my original sticker dot photogram and a random strip of photo paper. I found that the light travelled through the oil layer pretty quickly and did not need the 10 second exposure that I had tried. So, I tried again using another, smaller test strip, exposing the paper with the oil on top for only 4 seconds. This gave a much more defined, abstract look.
|
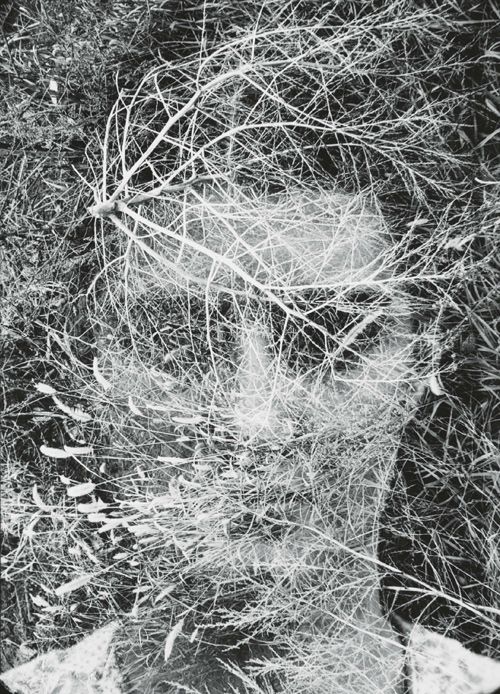
Abstraction using leaves
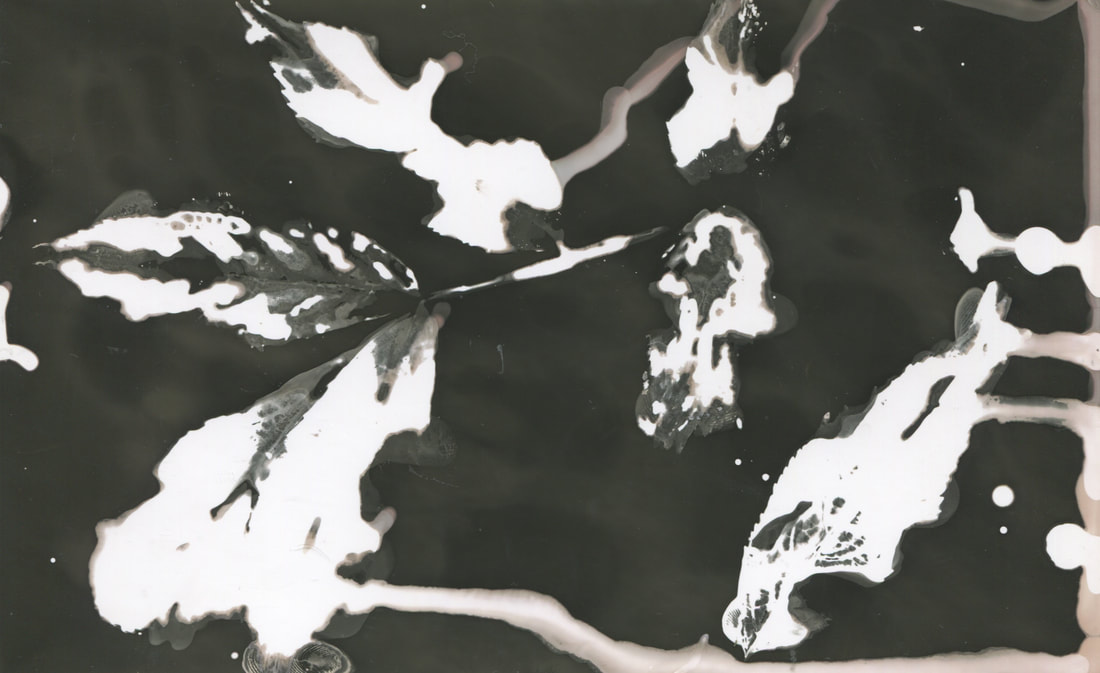
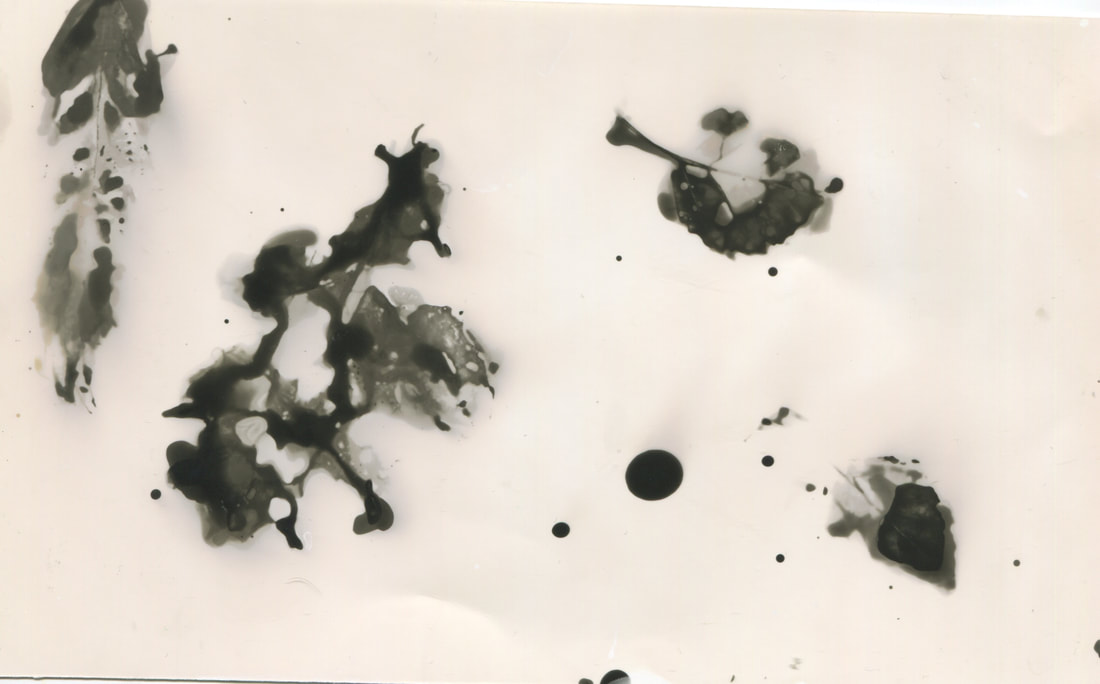
To create these images I found and collected a selection of leaves varying in size shape and type. The idea was to interrupt the development process of the light sensitive paper using organic elements dipped in either developer or fixer. The first two images were made using no light source at all, instead I dipped leaves into the 'fixer' chemical in the darkroom and pressed the leaf selection down hard so that all the edges were in contact with the paper as much as possible. I then peeled the leaves off one by one (trying not to let them slip over the page) and placed the whole image into the 'developer' chemical which developed the image everywhere apart from those places on the page interrupted with fixer. The first image, as you can see, was left to develop for longer than the first as the second. This was purposeful as I wanted to get a more greyish, softer feel to my second chemigram than the first.
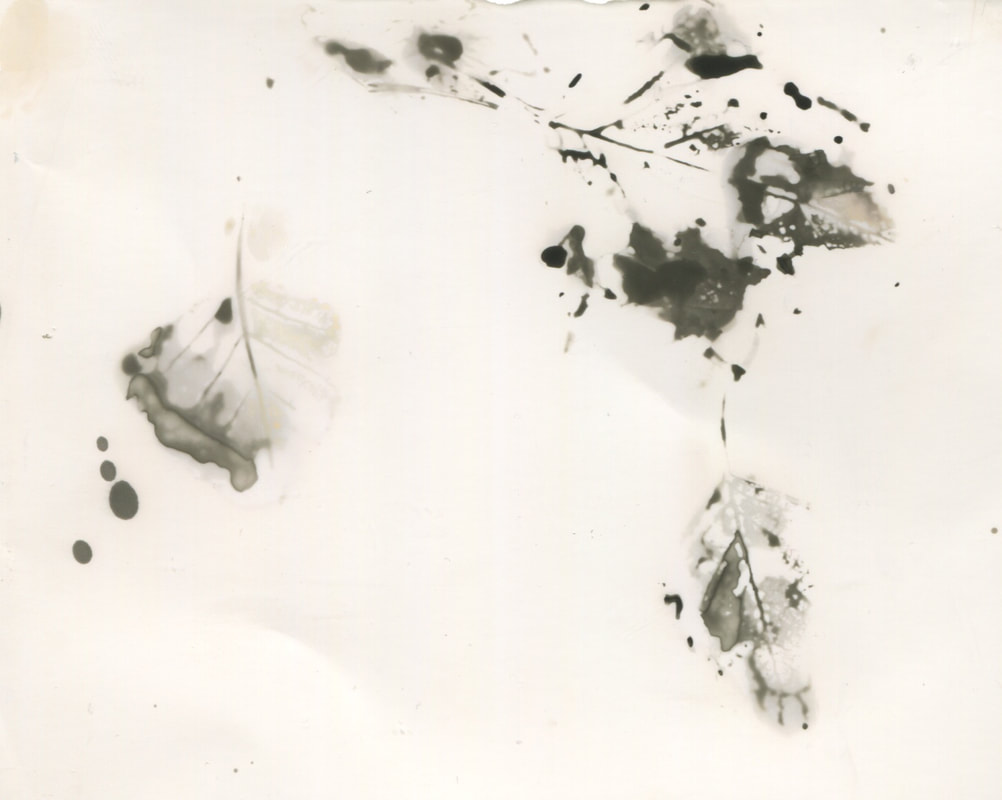
The third and fourth images were made by bringing the light sensitive paper out into the classrooms natural light for a brief duration. I then coated the remaining leaves in the 'developer' chemical and pressed them onto the page once again.
The third and fourth images were made by bringing the light sensitive paper out into the classrooms natural light for a brief duration. I then coated the remaining leaves in the 'developer' chemical and pressed them onto the page once again.
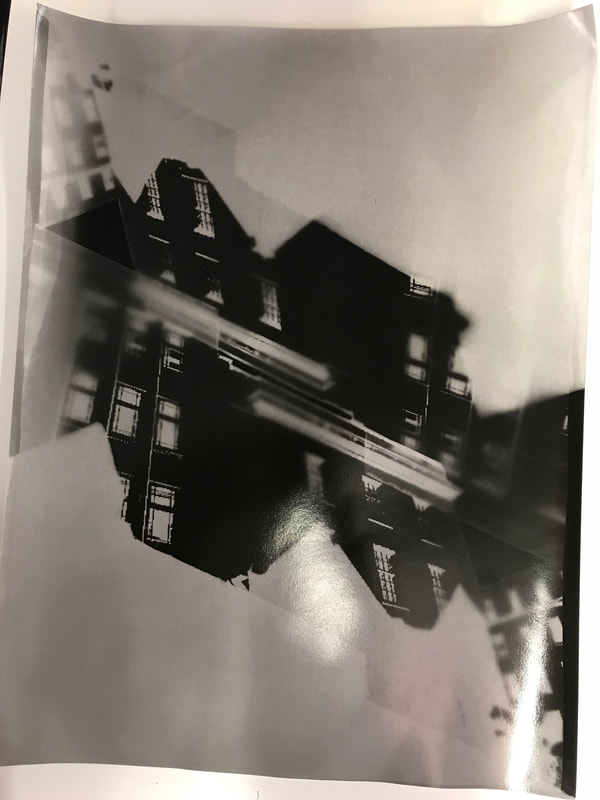
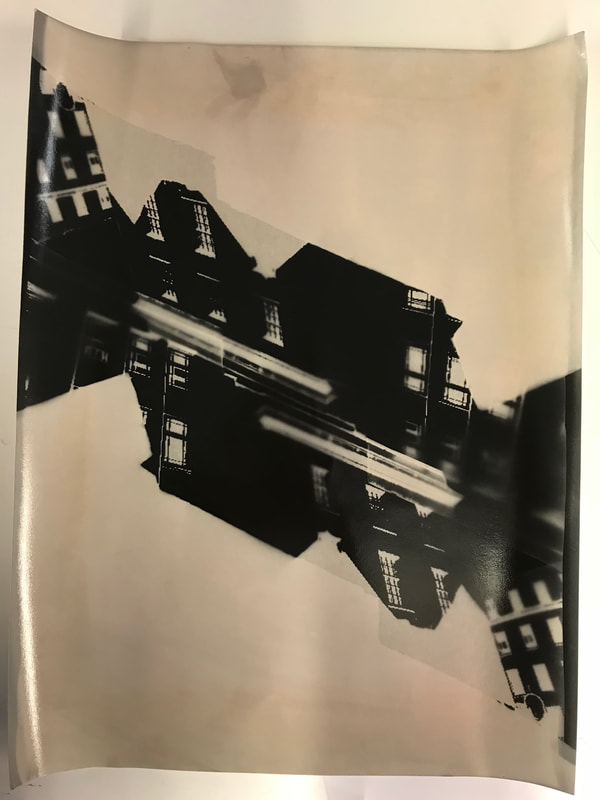
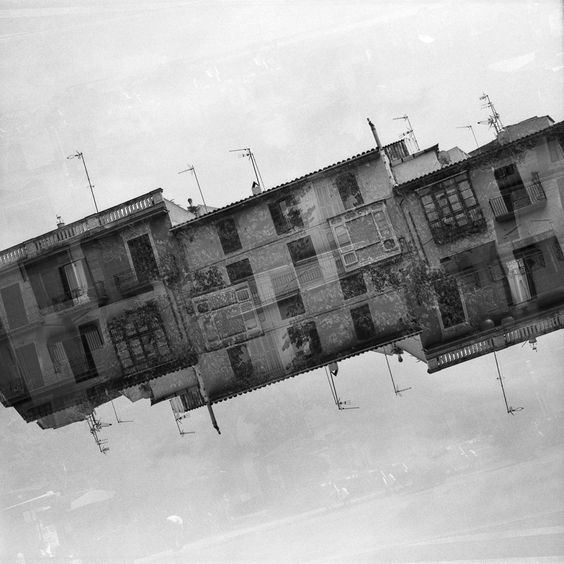
Distortion & Disruption
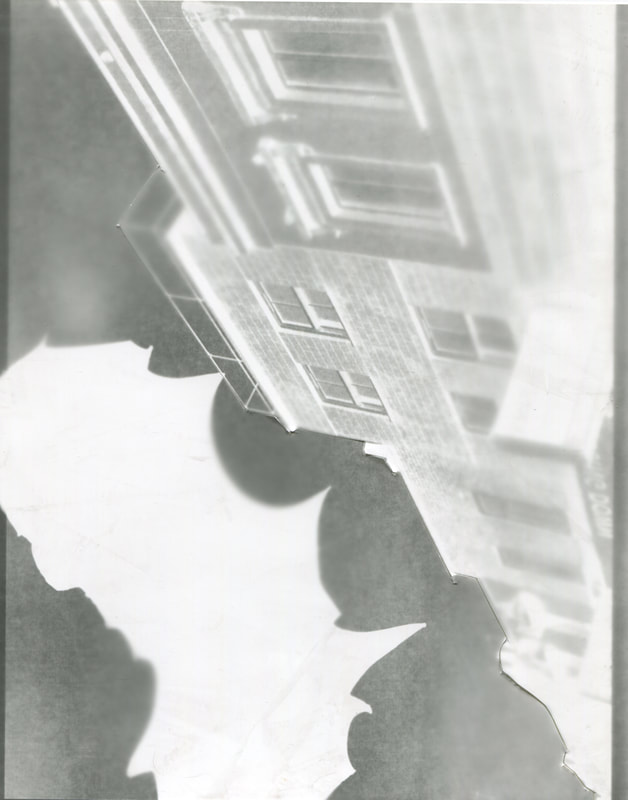
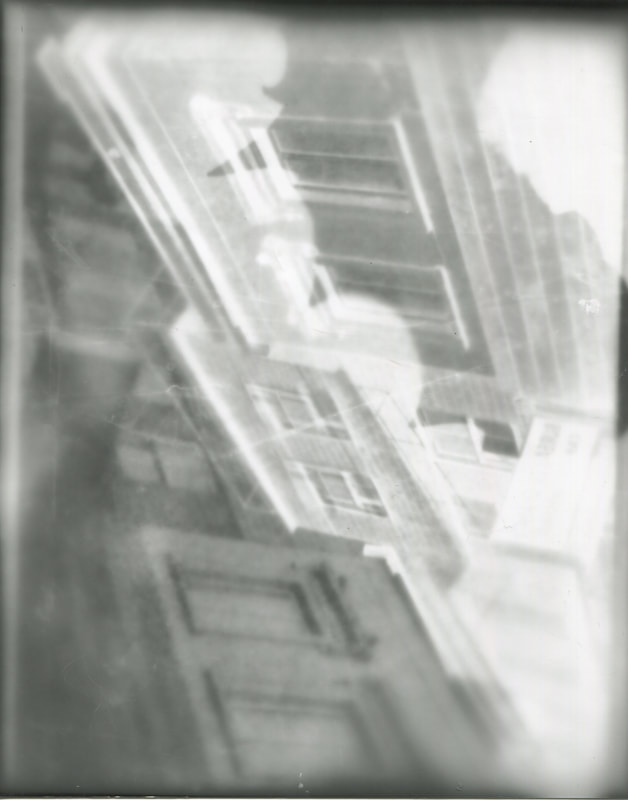
I continued with my theme of distortion and disruption. On my way to school I found this rather peculiar piece of plastic just sitting there. It had very jagged edges with sharp tips. Just like how I found the leaves distributed over the floor in the last lesson and collected them, I did the same with this strange object and incorporated it into my piece. It was curved in a sort of domed/semi-circle shape so that not all of the surface of the object was touching the paper at one time, this I thought would give a blurred effect to some edges however it didn't because the object was completely opaque and casted a shadow.
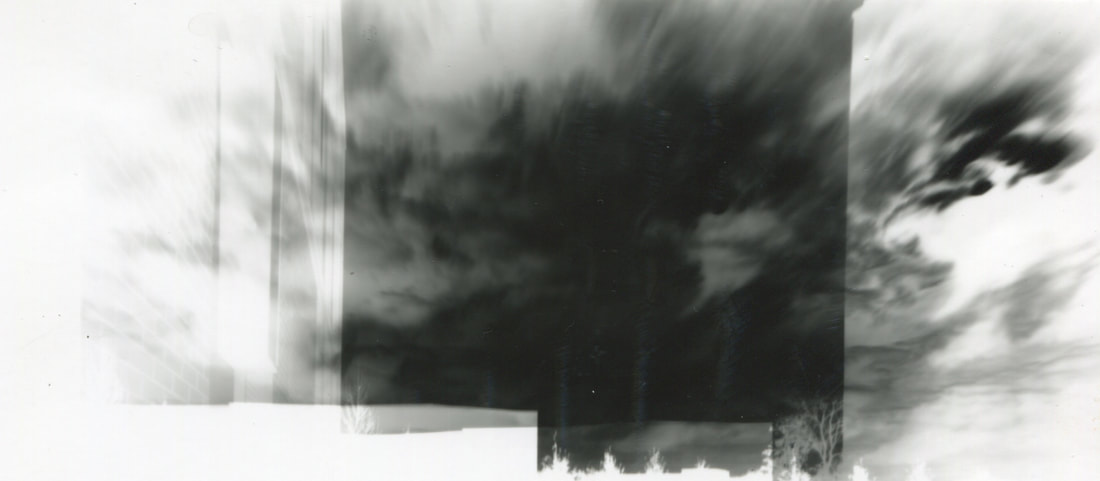
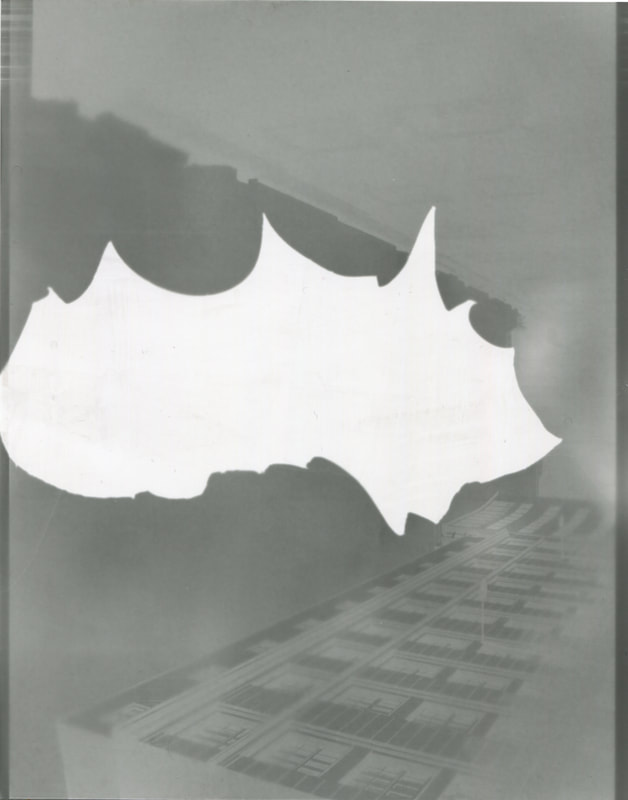
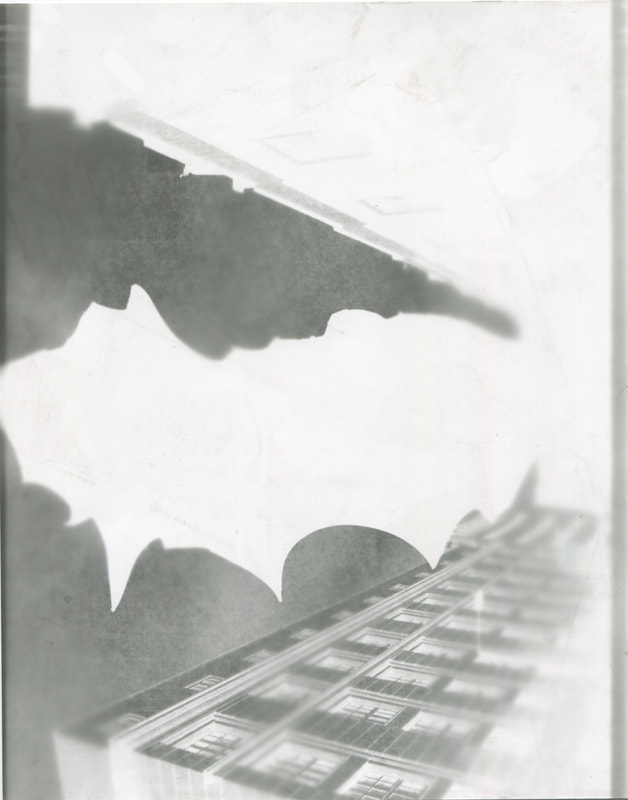
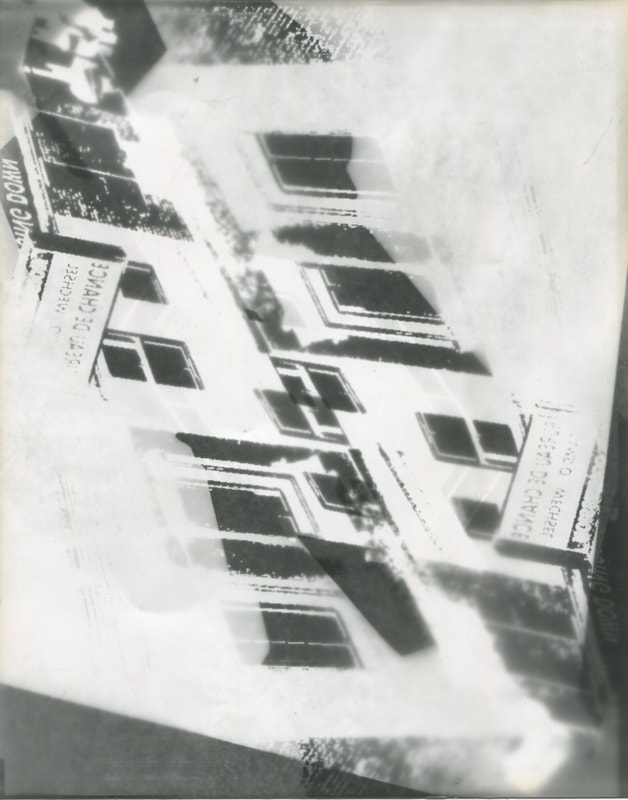
I yet again printed off one of my own images (found in my 'Camden exploration' series) and used it as the subject to my photogram. I placed my image facing downwards onto the opposing photographic paper facing upwards, I then positioned the weird plastic object in the 'sky' above the buildings casting a looming abstraction over it. I then tested this out using another one of my own images (also found in my 'Camden exploration') however I accidentally put the photographic paper facing downwards with the image underneath and the object on top! I decided to scan in this mistake anyway because I think it is cool how every step in the seemingly simple process of making a photogram is crucial to the final outcome. The objects seems as if it is the main subject situated in front of the buildings. So, I attempted this again with the same image. This time the paper was the right way up! Neither photogram came out as I had envisioned it to look which was disappointing, but I moved on.
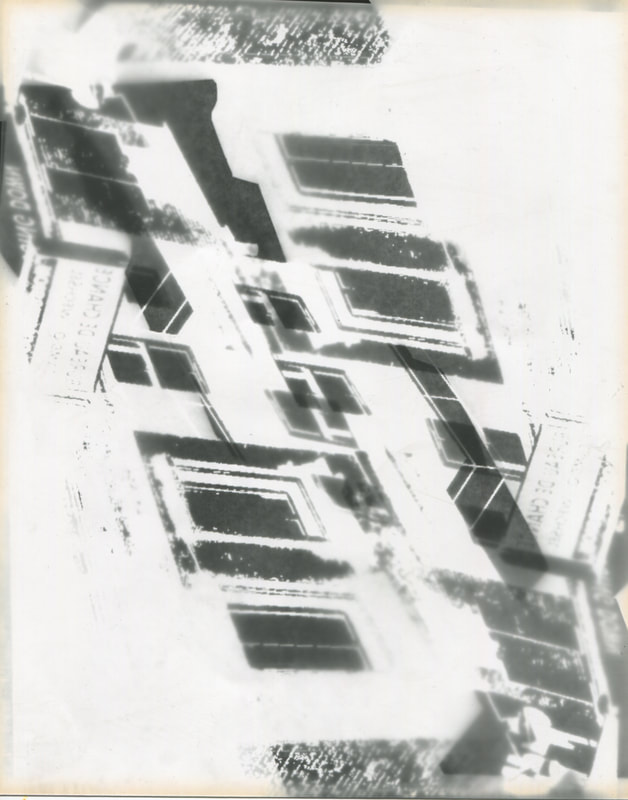
I then had an idea spring to mind to make the image more abstract looking. I took my original printed out colour image and the original photogram I had made (reference to the first image above) and turned them to face each other - upside down so that the whole photogram would be covered in this distortion of buildings. I wanted to use the original photogram with the interruption of the strange object, instead of making a whole new clean one without the interruption, so that there was even more disruption to the image making it look more abstract. I placed the two inwards facing images onto a new sheet of photographic paper (at the bottom of the pile with the original print out in between the two layers). I exposed this for around 30 seconds as there was many layers of paper for the light to travel through. I liked how this was going so I showed my teacher who suggested researching the work of Harry Callahan and his double exposures.
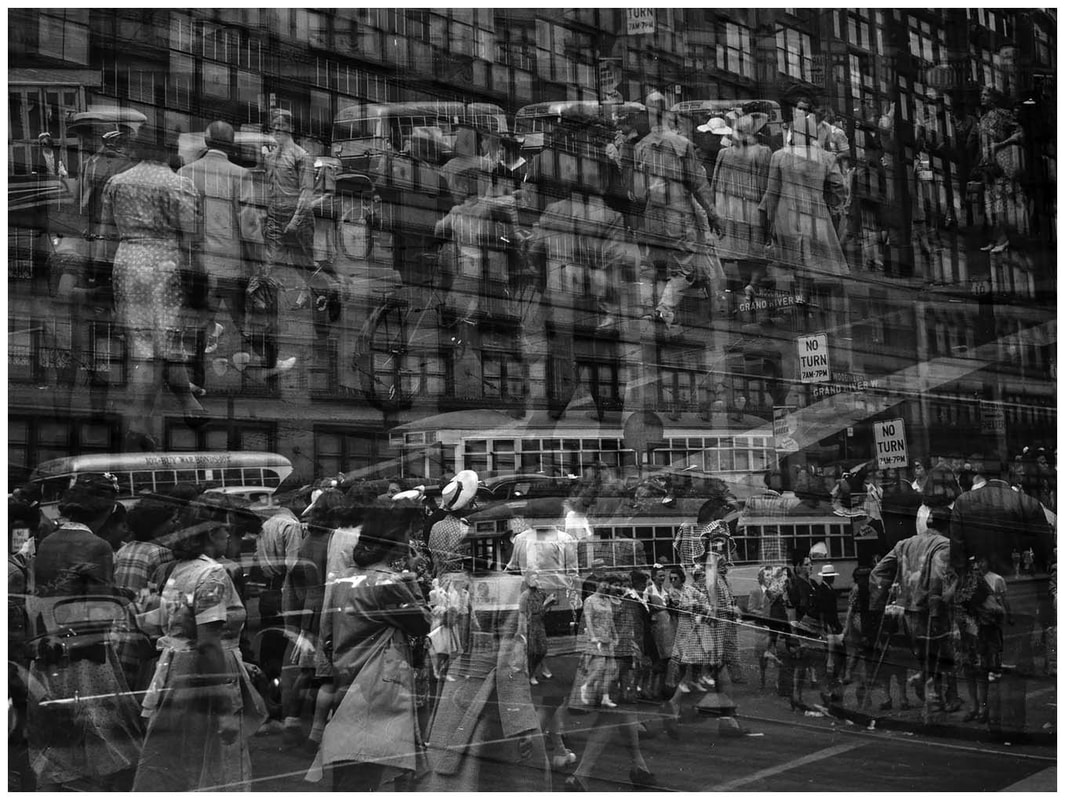
Harry Callahan
He experimented with many techniques in his lifetime. According to Callahan's own writings, he was terrifically naive, which he considered his great strength. He felt that he had fresh eyes because he didn't have any training. He was totally self-motivated, extremely curious about technique, and continually willing to try new approaches. He worked with extreme contrast, collage, multiple and time exposures, camera motion, and unique lighting. Callahan supported the idea that an art form like photography was as much machine-made as it was man made. An analysis of Callahan's style in Contemporary Photographers, concluded that "… his photographs can be viewed as a lifelong challenge to the camera's eye, a series of never ending questions on the nature of the medium itself." Subjects from everyday life were Callahan's choice through most of his career, especially his wife Eleanor and his daughter Barbara. Callahan was married to the same woman all of his adult life and was devoted to his family. He was one of the first photographers to earn a successful living in the profession. Callahan was considered to be an excellent teacher.
Double exposures:
I yet again printed off one of my own images (found in my 'Camden exploration' series) and used it as the subject to my photogram. I placed my image facing downwards onto the opposing photographic paper facing upwards, I then positioned the weird plastic object in the 'sky' above the buildings casting a looming abstraction over it. I then tested this out using another one of my own images (also found in my 'Camden exploration') however I accidentally put the photographic paper facing downwards with the image underneath and the object on top! I decided to scan in this mistake anyway because I think it is cool how every step in the seemingly simple process of making a photogram is crucial to the final outcome. The objects seems as if it is the main subject situated in front of the buildings. So, I attempted this again with the same image. This time the paper was the right way up! Neither photogram came out as I had envisioned it to look which was disappointing, but I moved on.
I then had an idea spring to mind to make the image more abstract looking. I took my original printed out colour image and the original photogram I had made (reference to the first image above) and turned them to face each other - upside down so that the whole photogram would be covered in this distortion of buildings. I wanted to use the original photogram with the interruption of the strange object, instead of making a whole new clean one without the interruption, so that there was even more disruption to the image making it look more abstract. I placed the two inwards facing images onto a new sheet of photographic paper (at the bottom of the pile with the original print out in between the two layers). I exposed this for around 30 seconds as there was many layers of paper for the light to travel through. I liked how this was going so I showed my teacher who suggested researching the work of Harry Callahan and his double exposures.
Harry Callahan
He experimented with many techniques in his lifetime. According to Callahan's own writings, he was terrifically naive, which he considered his great strength. He felt that he had fresh eyes because he didn't have any training. He was totally self-motivated, extremely curious about technique, and continually willing to try new approaches. He worked with extreme contrast, collage, multiple and time exposures, camera motion, and unique lighting. Callahan supported the idea that an art form like photography was as much machine-made as it was man made. An analysis of Callahan's style in Contemporary Photographers, concluded that "… his photographs can be viewed as a lifelong challenge to the camera's eye, a series of never ending questions on the nature of the medium itself." Subjects from everyday life were Callahan's choice through most of his career, especially his wife Eleanor and his daughter Barbara. Callahan was married to the same woman all of his adult life and was devoted to his family. He was one of the first photographers to earn a successful living in the profession. Callahan was considered to be an excellent teacher.
Double exposures:
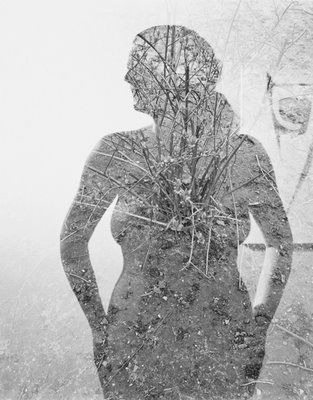
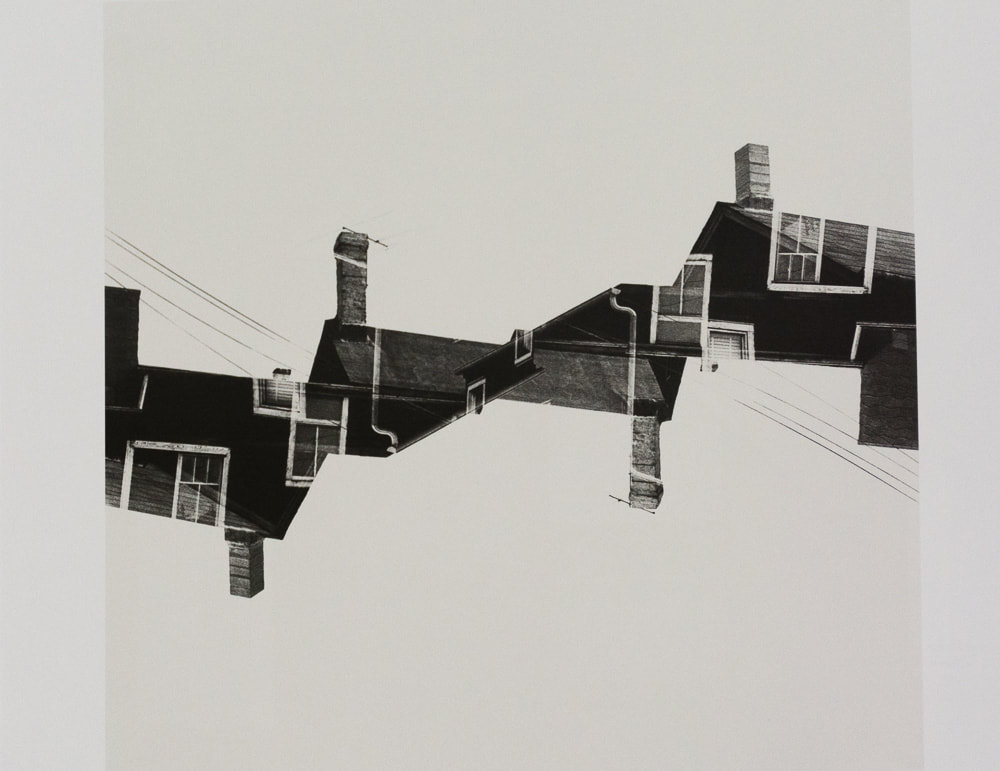
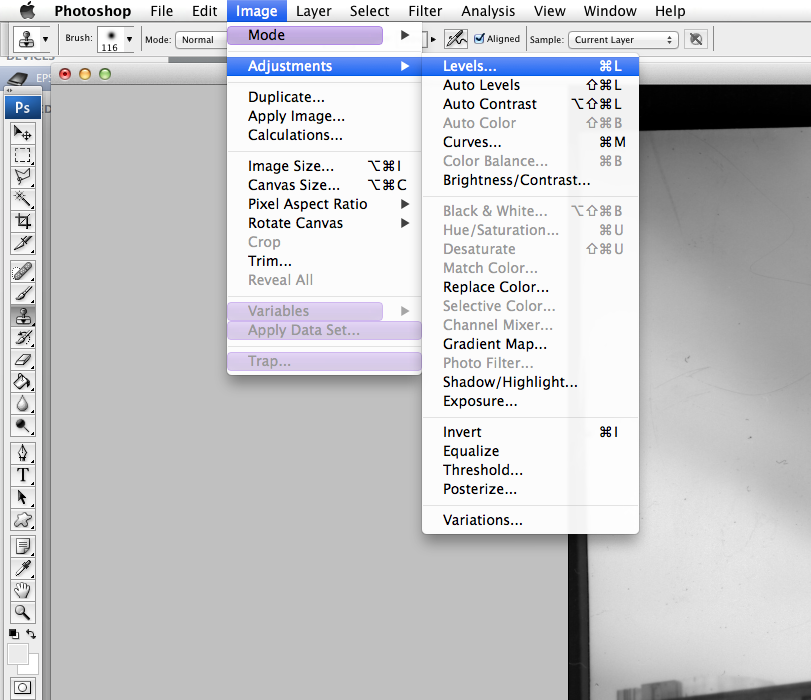
To create my own, clear, double exposures I first had to bump up the contrast between the lights and the darks. To do this I placed the original colour image of the buildings in Camden into photoshop. Image -> adjustments -> threshold, and adjusted the level of contrast until I saw fit (the same technique I used in Keld Helmer-Petersen's 'black light' series). I printed this image out twice and cut around the outlines.
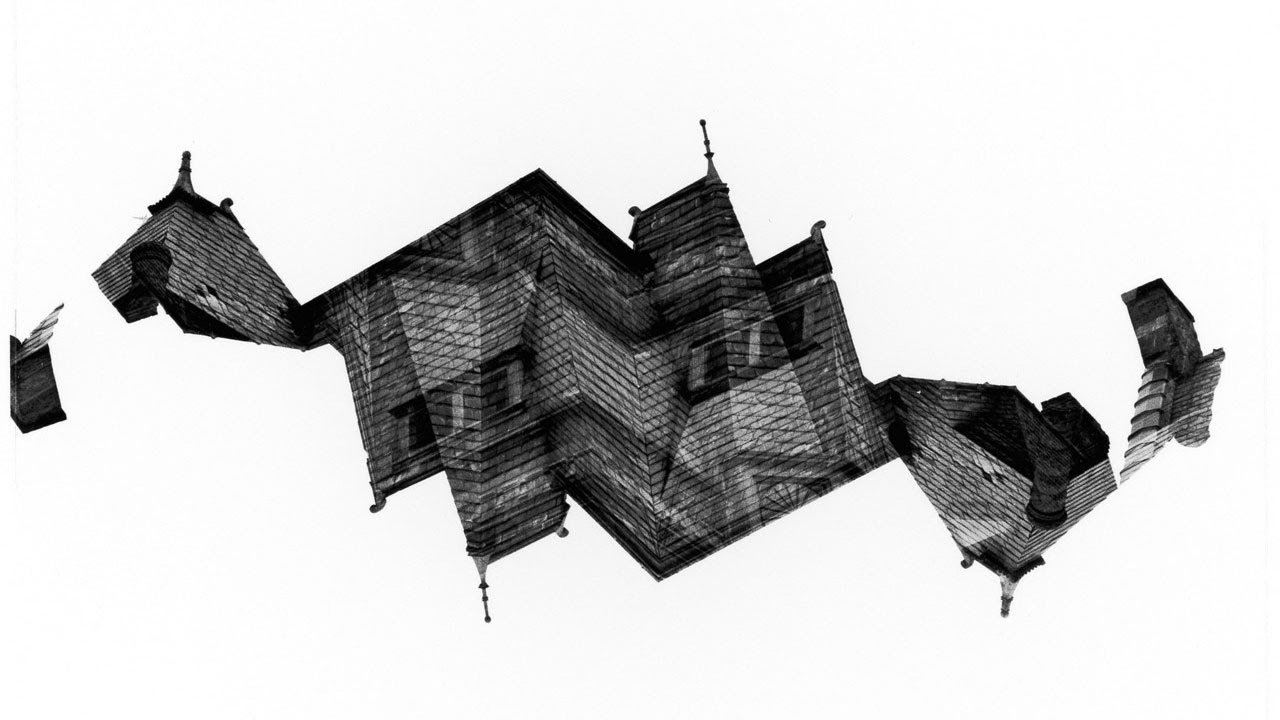
I cut around the outline (of the original photogram) of the buildings and used the two halves of the image to draw around (on a separate piece of cardboard) to create the basis for my distorted abstraction look.
I cut around the outline (of the original photogram) of the buildings and used the two halves of the image to draw around (on a separate piece of cardboard) to create the basis for my distorted abstraction look.
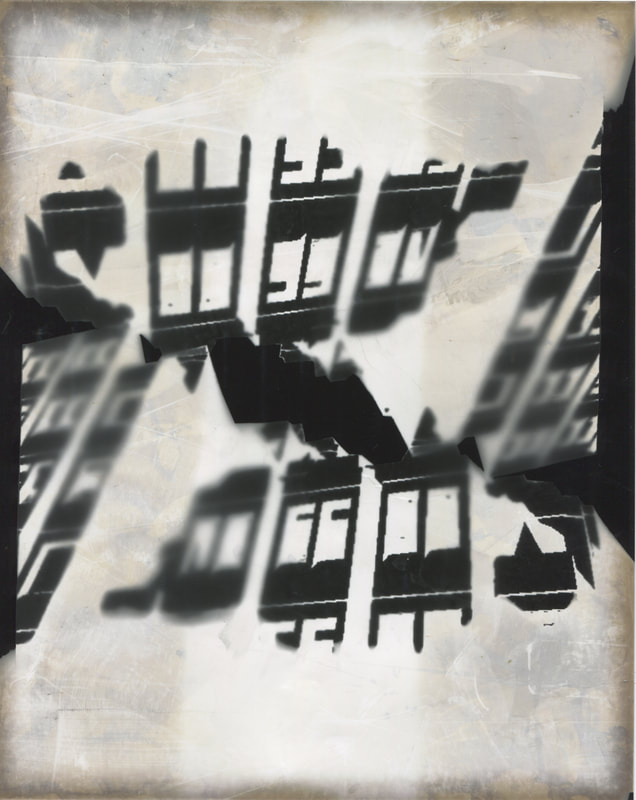
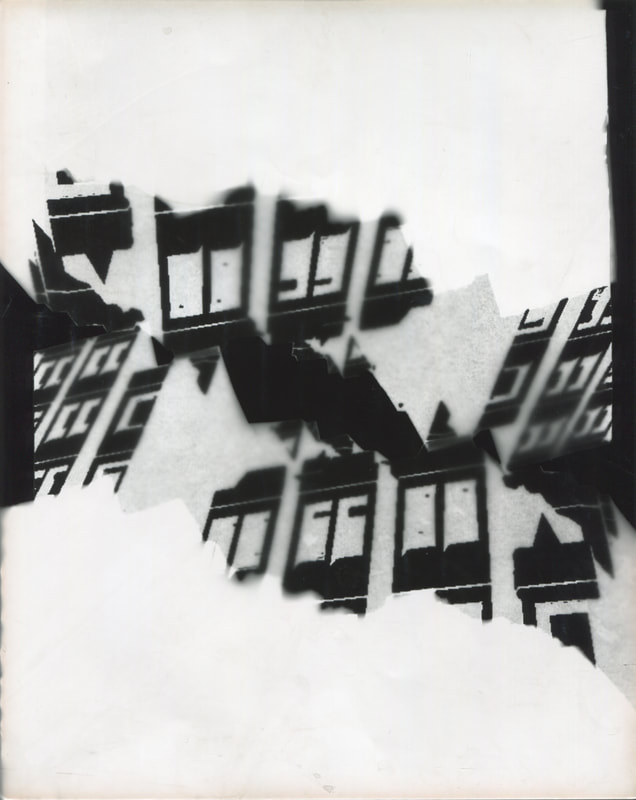
Final outcomes: